The showering experience is second to none.
There is nothing more relaxing than having a warm bath under a nice shower to help you relieve the day’s stress. It reduces tension and anxiety and calms your mood significantly.
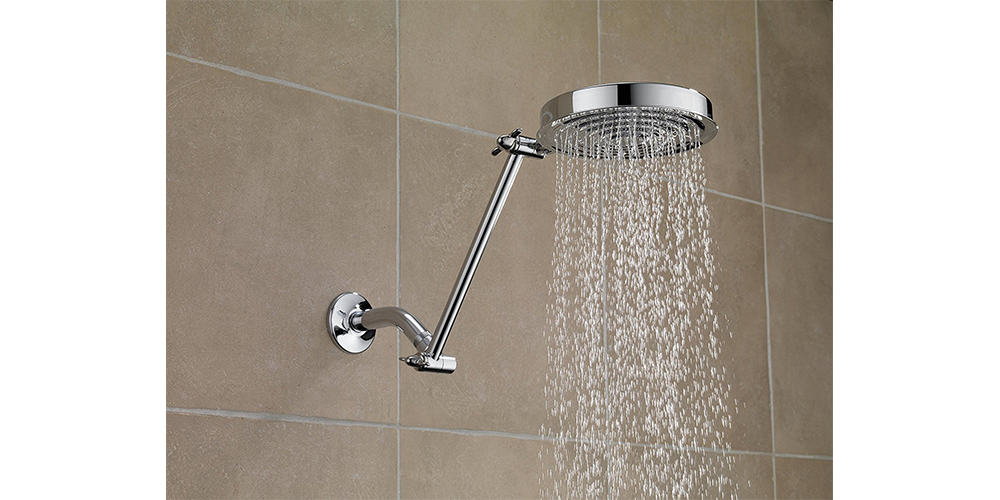
It doesn’t matter whether you want pressure or coverage shower heads. Pressure shower heads allow the water to be forcefully released on the body, while coverage shower heads create this rainy effect as the area that is covered by water is expanded.
In general cases, adjustable shower heads are pressure shower heads.
The beautiful thing about adjustable shower heads is that it gives room for versatility and fun, especially slide bar ones. It consists of a vertical bar that’s about 24-inch long and wall-mounted, with a handheld flexible sprayer. This spray is attached to the lock fitting, that fits into any position on the bar.
Slide-bar adjustable shower heads are becoming very popular these days as they are very versatile. They can be adjusted to different heights, so they perform several functions ranging from washing the kids’ hair and bodies, washing the pet, rinsing walls after cleaning, to washing your hair.
Installation
The first step in the installation process is to remove the existing showerhead. All you have to do is to lock and position the pipe wrench on the pipe that protrudes from the shower wall. Rotate the wrench in such a way that it loosens the pipe (most preferably, counterclockwise direction)
Once loose, remove the wrench and begin to unwind the pipe by hand. Next thing is to wrap the Teflon tape around ½-inch diameter and 1-inch long brass nipple. Wrap the elbow with a thick cloth, and then tighten the elbow with a pipe wrench to the nipple.
Wrapping the elbow with thick cloth is very important. This helps to prevent touching and damaging the finish on the elbow.
Now, proceed to install the slide bar. Create a mounting bracket on both ends of the wall, then lift the slide bar against the wall of the shower, about 52 inches above the tub platform. Note that it can be between 52 to 72 inches high to give room for different heights.
Note the plumb with the level, then indicate the screw hole location on the lower and upper brackets. If the wall is tiled, then you need a hammer and nail to mark the center of the hole, then drill. But if the wall is made of acrylic, fiber-glass, or any other solid surface, then create the holes with a normal twist-drill bit.
The holes will most likely be between studs, so you’ll need a ½ inch-diameter bit to increase the screw holes. But if the holes hit the studs directly, which rarely happens, then you can go ahead to attach stainless steel screws to the bar.
Take a hollow wall anchor and insert it into the screw holes. Tighten the bar to the anchor with machine screws, and hide the screw heads by capping the ends to the mounting brackets at the top and bottom of the bar.
Finally, take the flexible shower hose and attach it to elbow.